Setting up Continuous Integration on Jenkins 2
Installing Jenkins 2
Standard
Install JDK 8 on your machine.
Go to the official site https://jenkins.io/2.0/
Download the jenkins.war
With Docker
Launch the Docker image (the default port has been changed to 18080 since the JHipster app is configured to run on 8080)
docker container run -d --name jenkins2 -p 18080:8080 -p 50000:50000 jenkins/jenkins
You can then access the Jenkins dashboard on
- http://localhost:18080 (on MacOS & Linux)
- http://192.168.99.100:18080 (on Windows)
- If this doesn't work replace
192.168.99.100with your docker's default ip address:docker-machine ip default
- If this doesn't work replace
Note: You'll be asked for an initialAdminPassword which you'll find in the logs during your container startup.
You can also access it via docker logs jenkins2
e.g.
*************************************************************
*************************************************************
*************************************************************

Jenkins initial setup is required. An admin user has been created and a password generated.
Please use the following password to proceed to installation:

6707db8735be4ee29xy056f65af6ea13

This may also be found at: /var/jenkins_home/secrets/initialAdminPassword

*************************************************************
*************************************************************
*************************************************************
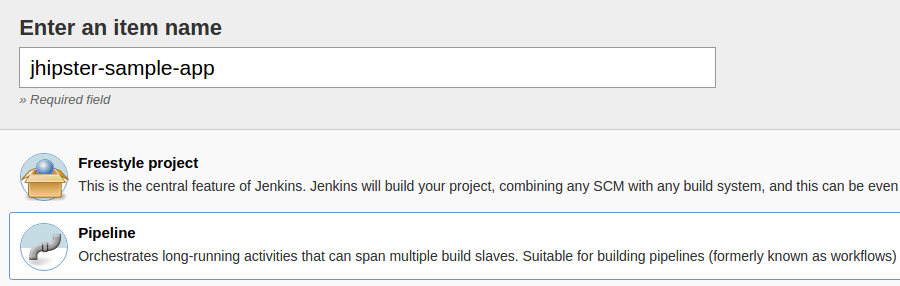
Create a new Job
- Add New Item
- Enter an item name
- Select pipeline
- Click OK
- Definition: Pipeline script from SCM
- SCM: Git
- Repositories
- Repository URL: select your repository here
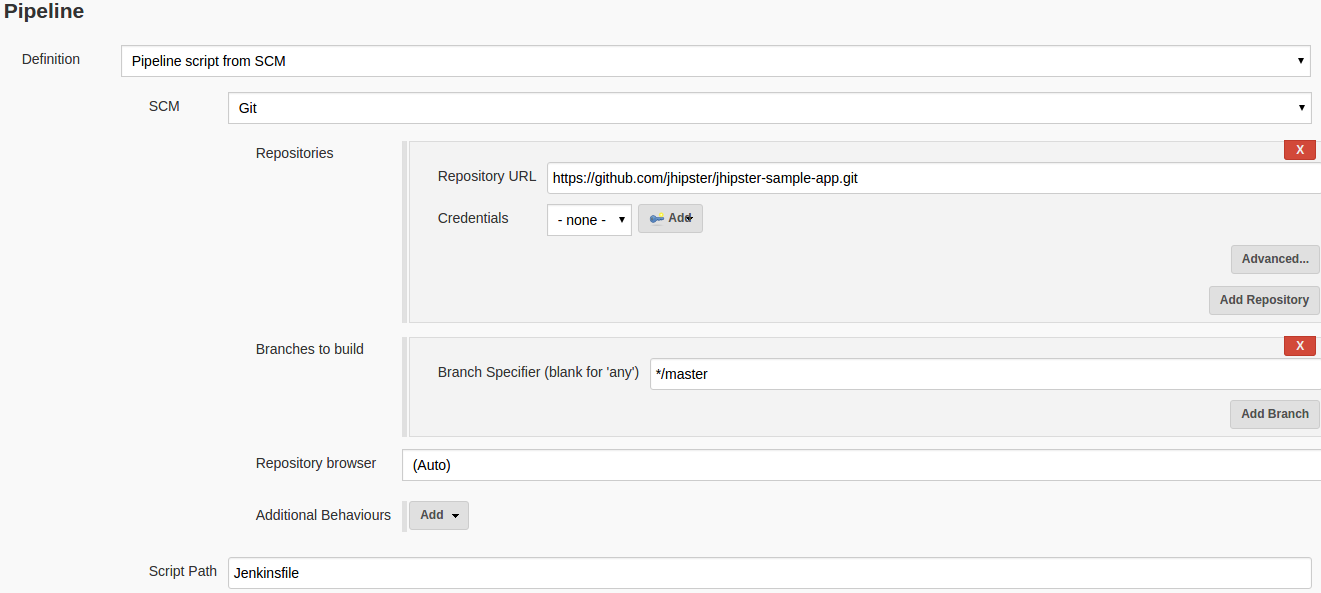
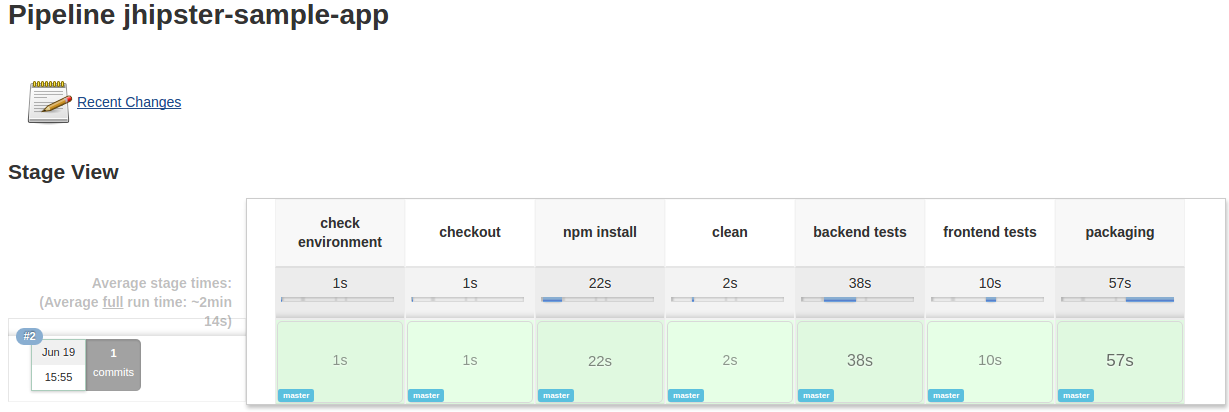
Jenkinsfile