Configuring Intellij IDEA
Open your project
- Simply open your project normally
- Maven should be detected, and your project will build automatically
If you want more control on your setup, you can also choose “Import project”.
Exclude directories
If you use Git, just initialize your project (git init && git add . && git commit -m 'Initial commit'), Intellij IDEA will automatically exclude directories which are ignored by Git (so you don’t have anything to do).
To exclude directories manually:
- Right-click on the
node_modules/folder - Select “Mark Directory As” and select “Excluded”

As the node_modules/ directory is only used internally by JHipster, it can be safely excluded.
Spring Support (not available in Community Edition)
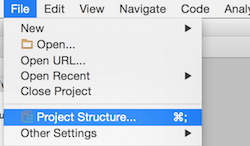
To add Spring support to many of the JHipster modules from a new project first go to File → Project Structure.

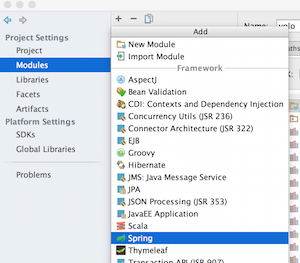
Then go to the Modules tab, click on the + button, and then click on “Spring” to add Spring code assistance to your project.

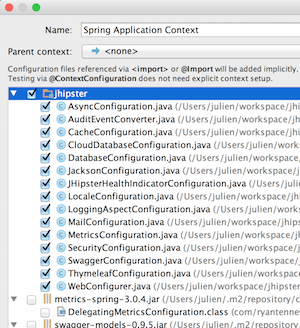
It will tell you there are unmapped Spring configuration files, click on the + sign on the bottom right (not the original one) and select all the Spring files that belong to your project, just clicking the folder is enough to select everything.

After that click OK, and Spring should be configured with proper code assistance.
Now click on the original + button which you used to add Spring in the first place, and add Hibernate. You do not need to add any files on this one, just adding it there will give you Hibernate based code assistance. Remember to click OK on the Project structure dialog.
You should now have Spring support for most of the codebase. You have to repeat this step every time you start a new project, as these settings are project-specific.
Application “hot restart” with Spring Boot devtools
Spring Boot devtools is configured by JHipster, and will “hot restart” your application when classes from your project are compiled. This is a must-have feature, as it makes your application updated on the fly.
By default IntelliJ IDEA does not automatically compile files when the application is running. To enable the “Compile on save” feature:
- Go to
File -> Settings -> Build, Execution, Deployment -> Compilerand enable “Make project automatically” - Open the Action window :
- Linux :
CTRL+SHIFT+A - Mac OSX :
SHIFT+COMMAND+A - Windows :
CTRL+ALT+SHIFT+/
- Linux :
- Enter
Registry...and enablecompiler.automake.allow.when.app.running
Maven IDE profile
If you are using Maven, you need to activate the IDE profile in IntelliJ. This is used for applying IDE-specific tweaks
which currently only includes applying the MapStruct annotation processor.
Open the “Maven Projects” tool window (View -> Tool Windows), check the IDE maven profile to activate it.
Gradle
In order to get the best out-of-the-box experience with Gradle you should delegate all IDE build/run actions to Gradle directly. With this setting annotation processing is automatically configured and you won’t have duplicated classes when mixing IDE and cli builds. If you are using an older version ( < 2016.3) you have to enable annotaion processing manually.